

This AWESOME recipe is from Peggy Weaver at whatscookingamerica.net. She has many great tips to share and is a very entertaining teacher as well :)
16 ounces white mini-marshmallows (use a good quality brand)
2 to 5 tablespoons water
2 pounds icing sugar (please use C&H Cane Powdered Sugar for the best results)
1/2 cup Crisco shortening (you will be digging into it so place in a very easily accessed bowl)
Melt marshmallows and 2 tablespoons of water in a microwave or double boiler: Put the bowl in the microwave for 30 seconds, open microwave and stir, back in microwave for 30 seconds more, open microwave and stir again, and continue doing this until melted. It usually takes about 2 1/2 minutes total. Place 3/4 of the powdered sugar on the top of the melted marshmallow mix.
Now grease your hands GENEROUSLY (palms, backs, and in between fingers), then heavily grease the counter you will be using and dump the bowl of marshmallow/sugar mixture in the middle. (By the way, this recipe is also good for your hands. When I’m done, they are baby soft.)
Start kneading like you would bread dough. You will immediately see why you have greased your hands. If you have children in the room they will either laugh at you or look at you with a questioning expression. You might even hear a muttered, “What are you doing?”
Keep kneading, this stuff is sticky at this stage! Add the rest of the powdered sugar and knead some more. Re-grease your hands and counter when the fondant starts sticking. If the mix is tearing easily, it is to dry, so add water (about 1/2 tablespoon at a time and then knead it in). It usually takes me about 8 minutes to get a firm smooth elastic ball so that it will stretch without tearing when you apply it to the cake.
It is best if you can let it sit, double wrapped, overnight (but you can use it right away if there are no tiny bits of dry powdered sugar). If you do see them, you will need to knead and maybe add a few more drops of water.
Prepare the fondant icing for storing by coating it with a good layer of Crisco shortening, wrap in a plastic-type wrap product and then put it in a re-sealable or Ziploc bag. Squeeze out as much air as possible.
MM Fondant icing will hold very well in the refrigerator for weeks. If I know that I have a cake to decorate, I usually make two (2) batches on a free night during the week so it is ready when I need it. Take advantage of the fact that this fondant icing can be prepared well in advance.
Wednesday, December 30, 2009
A Great Recipe For Rolled Fondant
I found this recipe on allrecipes.com and thought I'd share with you. Experiment with icing flavorings to compliment your cake :)
Submitted By: HOLLY D
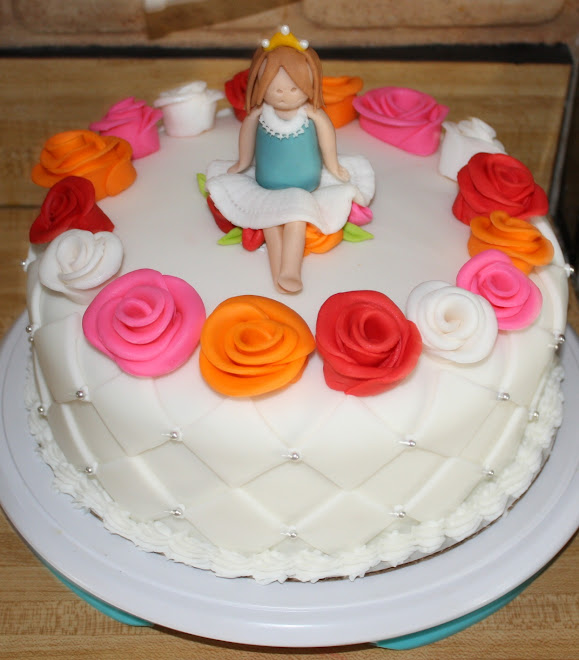
Photo By: SugarRush
Prep Time: 10 Minutes
Cook Time: 5 Minutes Ready In: 30 Minutes
Servings: 16
"Fondant is a rolled sugar paste used to decorate cakes, and is the secret of many cake decorating professionals. This version comes together easily in your mixer and uses gelatin as a binder. "
Ingredients:
1 tablespoon unflavored gelatin
1/4 cup water
1/2 cup corn syrup
1 tablespoon vegetable oil 2 tablespoons shortening
8 cups confectioners' sugar
1/4 cup cornstarch, for rolling out the dough
Directions:
1. Place gelatin and water in a small saucepan over low heat. Stir until gelatin is melted. Remove from heat.
2. Combine the corn syrup, vegetable oil, shortening, and confectioners' sugar in the bowl of a stand mixer. Turn the mixer on low, and add the gelatin mixture. Beat on low speed until a paste is formed. Refrigerate for 15 minutes to let harden slightly.
3. To use, roll the fondant to 1/4 inch thickness, using cornstarch to coat the work surface and the rolling pin. Transfer fondant by rolling it around the rolling pin. Place fondant over cake and unroll it, stretching it into place as necessary. Use a paring knife to cut away the excess. Store unused fondant in an airtight container
Submitted By: HOLLY D
Photo By: SugarRush
Prep Time: 10 Minutes
Cook Time: 5 Minutes Ready In: 30 Minutes
Servings: 16
"Fondant is a rolled sugar paste used to decorate cakes, and is the secret of many cake decorating professionals. This version comes together easily in your mixer and uses gelatin as a binder. "
Ingredients:
1 tablespoon unflavored gelatin
1/4 cup water
1/2 cup corn syrup
1 tablespoon vegetable oil 2 tablespoons shortening
8 cups confectioners' sugar
1/4 cup cornstarch, for rolling out the dough
Directions:
1. Place gelatin and water in a small saucepan over low heat. Stir until gelatin is melted. Remove from heat.
2. Combine the corn syrup, vegetable oil, shortening, and confectioners' sugar in the bowl of a stand mixer. Turn the mixer on low, and add the gelatin mixture. Beat on low speed until a paste is formed. Refrigerate for 15 minutes to let harden slightly.
3. To use, roll the fondant to 1/4 inch thickness, using cornstarch to coat the work surface and the rolling pin. Transfer fondant by rolling it around the rolling pin. Place fondant over cake and unroll it, stretching it into place as necessary. Use a paring knife to cut away the excess. Store unused fondant in an airtight container
Tuesday, December 29, 2009
Covering a Square Cake
I find this to be a bit trickier, but this video from natiscakes sure helped me out alot!
Covering a Cake With Fondant
This video from Bercaw Solutions really helped me with covering a cake with rolled fondant. Before watching this video, I had trouble getting rid of wrinkles and excess fondant at the tailend of the smoothing process, but after I watched the technique shown here, it was no sweat!
Beginners Tips For Working With Fondant
I've learned that creating your own special occasion cakes gives you a real sense of accomplishment and pride that a store-bought cake just can't. People feel honored that you spent the time and effort to make their cake "their own". A grocery store just cant produce the "oooohs" and "ahhhs" that you can!
The internet has been my only source of learning how to decorate cakes in a tasteful way using icing and fondant. Edna has several videos online, and she is an amazing teacher. Below are some videos of hers that are absolutely a MUST WATCH for beginners!!
The internet has been my only source of learning how to decorate cakes in a tasteful way using icing and fondant. Edna has several videos online, and she is an amazing teacher. Below are some videos of hers that are absolutely a MUST WATCH for beginners!!
Subscribe to:
Posts (Atom)


.jpg)